How to build HiKey960 Android from ground zero
来自个人维基
2019年11月21日 (四) 12:18free6d1823(讨论 | 贡献)的版本
example here:
Host: Ubuntu 16.04
Board: Hikey960 Ver B.
Target Linux version: v4.9
Target Android version: R
1. Download: download all source in ~/hikey960 folder
1.1 Download AOSP source
 mkdir ~/hikey960
 cd ~/hikey960
 mkdir android
 export AOSP_ROOTDIR=~/hikey960/android
 cd ${AOSP_ROOTDIR}
 git clone "source to be verified again!!"
 #download vendor patches
 wget hisilicon-hikey960-OPR-3c243263.tgz
 tar -xvf hisilicon-hikey960-OPR-3c243263.tgz
 #extract to vendor folder. key in "I ACCEPT" in the end
 ./extract-hisilicon-hikey960.sh
 #now you have full Hikey AOSP BSP
1.2 Download linux kernel source
 cd ~/hikey960
 git clone https://github.com/96boards-hikey/linux.git
 #extrac Linux kernel to ~/hikey960/linux folder
 tar -xvf hikey-linaro_4.9.tar.gz
1.3 Download new gcc
http://releases.linaro.org/components/toolchain/binaries/latest-7/aarch64-linux-gnu/gcc-linaro-7.4.1-2019.02-x86_64_aarch64-linux-gnu.tar.xz
 cd /opt
 #install gcc in /opt/gcc-linaro-7.4.1-2019.02-x86_64_aarch64-linux-gnu
 tar -xvf gcc-linaro-7.4.1-2019.02-x86_64_aarch64-linux-gnu.tar.xz
2. Build
2.1 Build kernel
export PATH=$PATH:/opt/gcc-linaro-7.4.1-2019.02-x86_64_aarch64-linux-gnu/bin
export AOSP_ROOTDIR=~/hikey960/android
export KERNEL_DIR=~/hikey960/linux
export ARCH=arm64
export CROSS_COMPILE=/aarch64-linux-gnu-

cd ${KERNEL_DIR}
make distclean
make hikey960_defconfig
make -j7 Image.gz
make hisilicon/hi3660-hikey960.dtb
#this is different from some guides
cp ${KERNEL_DIR}/arch/arm64/boot/Image.gz-dtb ${AOSP_ROOTDIR}/device/linaro/hikey-kernel/Image.gz-dtb-4.9
cp ${KERNEL_DIR}/arch/arm64/boot/dts/hisilicon/hi3660-hikey960.dtb ${AOSP_ROOTDIR}/device/linaro/hikey-kernel/hi3660-hikey960.dtb-4.9
2.2 Build AOSP
cd ${AOSP_ROOTDIR}
. ./build/envsetup
lunch hikey960_userdebug
#if make error, try to make again
make -j24
3. Flash
To enter the fastboot mode:
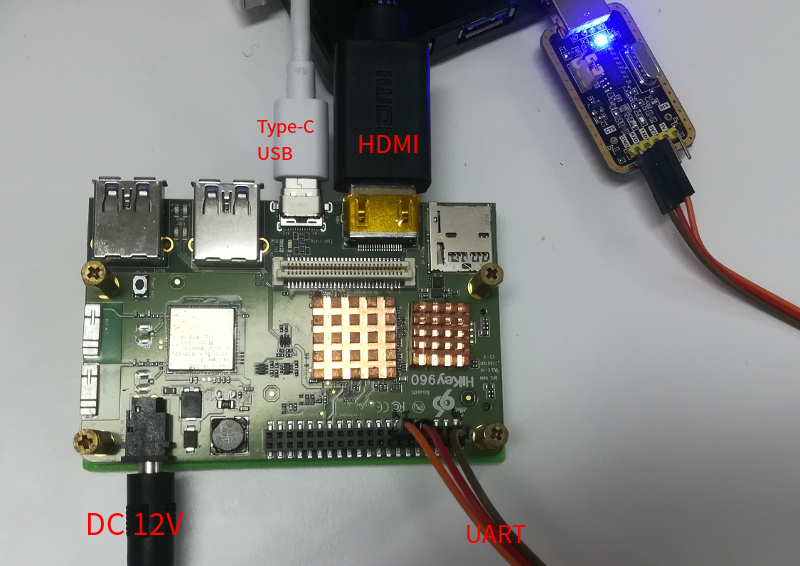
Connect Type-C USB cable to Host and the board.
On the back of the board, switch 1 on, switch 2 off, switch 3 on.
Power on by plug the 12V DC adaptor
sudo fastboot devices
sudo fastboot flash boot boot.img
sudo fastboot flash dts dt.img
sudo fastboot flash system system.img
sudo fastboot flash userdata userdata.img
sudo fastboot flash vendor vendor.img
4. Run
Not the sequence here:
(1) Power off the board.
(2) Switch 3 off
(3) Remove Type-C USB cable.
(4) Power on again.
Note that if Type-C USB cable is connected to host, the USB mouse will not be usable.
